Monday, June 29, 2009
Fabric Tags
My New Fabric Tags! Yay!
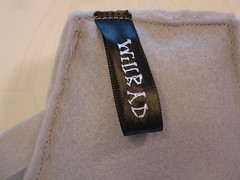
I ordered these custom fabric tags from BellaMental on etsy and they came in last week - they look so awesome! I did the design, but the printing just turned out really well, and for such a reasonable price!
These are 1.5" x 1" tags (they fold in the middle, so the name & URL are on both sides). Very soon now, there will be lots of stuffed animals with these! Probably lumpy and weird looking ones!
This is what I was doing previously for tags:
Yes, hand-stitching the tags did look cool, but unfortunately I am no longer updating Willrad.com for an extended period of time, and "Futuregirl Leah Riley" or "futuregirl.etsy.com" was just a little too long for this type of tag.
I love that I can order small runs of custom tags! Yay for the internet and etsy!
Saturday, June 27, 2009
Skirt: Finished!
Finished Steampunk Lolita Skirt!
Just so you know, I finished the skirt! Just in time for the steampunk Clockwork Ball last night -if you want to see more pictures from the Clockwork Ball, just check out my photostream by clicking on the picture. I think I did the whole thing in about 24 hours, which bodes well, since this is just a prototype.
So, ya know, Woo! And stuff.
Friday, June 26, 2009
Suddenly Skirting
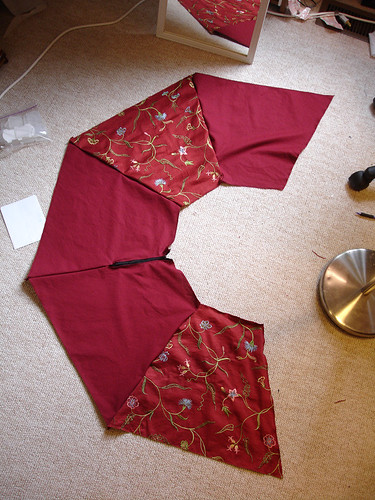
Skirt Pieces: Pinned & Laid Out
I've been tossing around the idea of making a skirt for the Clockwork Ball this Friday (tonight) night. Initially, I wanted to make something long and drapey. Then I sudden decided yesterday I should veer far far away from my original plan and make a lolita skirt.
This is the first skirt I've ever sewn from scratch, but I'm not just making it up as I go (though I'm doing that a little) - I'm basing it partially on this awesome victorian skirt tutorial and a skirt I have from In the Starlight. The rule is I'm only using materials I have on hand (including a black zipper that I'd ripped out of a skirt I was getting rid of). So far, it's coming out ok, though I had to rip out the zipper once, and it still looks funky the way I have it.
For reference, the decorative fabric is leftover from a table runner project, and the red is ... I don't know, maybe leftovers from Will's Zukko costume?
If you want more images, click on the one above - I'll update as it progresses. Right now, I'm sewing the panels together in a RACE AGAINST TIME! (I have a backup outfit planned, just in case.)
Monday, June 22, 2009
Stuffed Animals & Weekend
SpaceCat Sketch: Where All Stuffed Animals Begin
After some intensive painting last week for a commissioned project (pictures soon), and then a painting party over the weekend (I forgot my camera - but Michelle had hers!), I'm ready to settle in and do some sewing! (Besides the commissioned piece, I'm working on a few other side projects. Secret projects! Not as exciting as these exclamation marks indicate!!!)
First off, I will be attempting to make a sweet skirt for this Friday's upcoming Clockwork Ball in Chapel Hill. The skirt will be my first attempt at making a proper piece of clothing, instead of an accessory (or altering) so it also falls into the "prototype" category as well. It's scary cutting into fabric you really like, already shaking off the feeling that you're just going to screw it up and waste... ok, just cut it.
Secondly, once my new fabric tags come in from BellaMental I'm going to be sewing together some new prototype stuffed animals. Including Ol' Spacecat that you see there.
Speaking of stuffed animals:
Jason and Ryn of Random Signal (I designed their sweet cephalopodic logo) just finished up the Great Random Signal Name Our RoombaTM Contest. The winner is Paul Fischer, of the Balticon Podcast, with his winning submission 3-Sweepio!
Paul's prize? A plush robot handmade by me! My robot is a prize for a robot namer!
P.S. Robots!
Friday, June 19, 2009
Ear Placement, Destroying Scissors
Possum to Unintentional Bunny/Mouse!
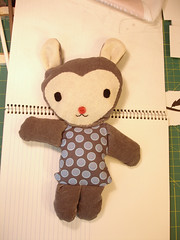
I've been working on plush animal designs, to help clear out the evidence of my ludicrous fabric-buying addiction. (This possum/bunny is made of corduroy pants that no longer fit, so super-soft). Sometimes, there are mistakes.
Take this possum prototype - I was working from a drawing, not entirely knowing how the pieces would fit together. Subsequently, I made the ears too big, and then placed them too far up on the head and... suddenly Bunny! (Or mouse?)
Whatever it is, it isn't a possum. It does make a cute bun/possum/mouse animal, so yay for that.
AND! I managed to break my favorite pair of scissors this week! I had to go to JoAnns and buy a new pair of Fiskars Softouch Micro-Tip Scissors (according to that link, they're excellent for "scrapboking"). Fortunately, they were 50% off.
I almost got the Titanium Nitride version, but decided that my habit of trying to cut through sewing machine needles (how I ruined the previous pair) wouldn't necessarily be helped by fancy alloys.
The Failbear Indicates This Post is Full of Failures
Wednesday, June 17, 2009
Wedding Design: Program & Invitations
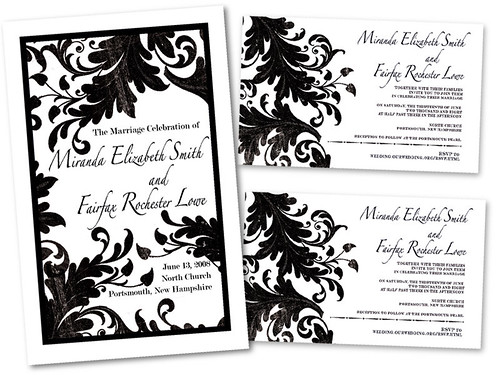
Leah-designed wedding program and invitations - names changed to protect the innocent
Freelance design gigs are pretty fun, especially because you can pick and choose your projects. The downside is the decision-making process - which projects to take, money vs. time, id vs. ego, etc.
This design project was all smooth sailing, even with the "Careful... careful!" feeling I get when I make things for people's weddings. One does not want to mess things up. Fortunately, we all kept each other updated, and I made sure I had backup plans (if this paper won't print, then I'll try this paper!)
Also, I love it when a project for something else turns into something that you can both be proud of. They love the product, and you want to put it in your portfolio!
Here's my tips for freelance design jobs:
- Be upfront about your pricing.
- Ask a million questions about what they want - and get them to send you links to images they like!
- Keep track of your hours and receipts.
Any other freelancers got some killer tips?
Monday, June 15, 2009
Etsy Shop Refill: Collages and Supplies
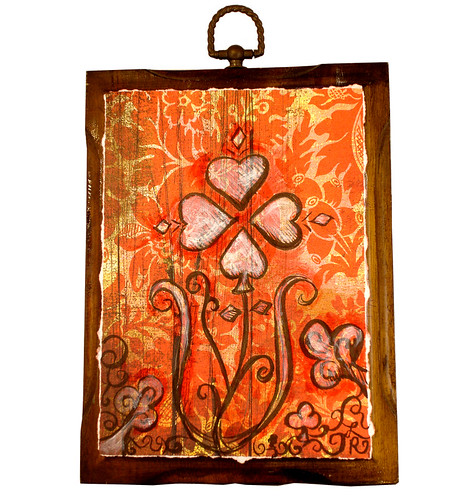
Three Hearts Beat As One
I've been working on some collages and mixed media pieces. While cleaning my studio, I realized I have a lot of paper I've collected over the years, and I should really get on with making stuff out of it.
Wildflower in Wonderland
I've also been doing a lot of research on book illustration, from illuminated manuscript to The Wizard of Oz - I find it all so fascinating. This piece was inspired by Through the Looking Glass.
So far, I've finished these two new pieces and put them in my Etsy.com shop. Can't hoard forever, right?
Speaking of hoarding, I'm also getting rid of some supplies that have ended up in the shop. There's old ribbon, push molds and Ole Miss / Colonel Reb fabric.
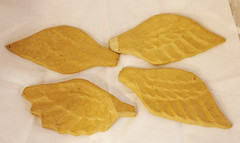
Papier Mache Wings
My favorite are these paper mache wings, which I've used in my previous art-craft week challenges. I just have so many of them, that I think I should get them out there for other people. Especially because they sell papier mache squirrels and dinosaurs, which I think would only be improved by the addition of angellic wings.
Also, I hate spelling papier mache, because it always seems wrong.
Two more things!
Thanks to SMUtopia for adding my Kraken print to her Octopi-themed Friday finds.
If you're interested in getting updates, images, specials, and warnings about what's coming soon, you can become a fan of Futuregirl Leah Riley's etsy shop on Facebook. Because facebook.
Wednesday, June 10, 2009
New Project - Seven Deadly Sins, Lolita Style
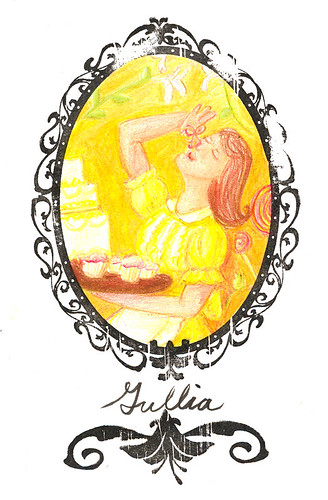
Gullia (Gluttony)
With the exception of the ink stamped exterior, and the hand-written title, this is all done in colored pencil. I've been meaning to experiment with colored pencils, and working on multi-piece project seemed like a good idea.
This may not be the final version, and I may want to go over the piece and up the contrast some with ink or paint, but I feel that it's not a bad beginning. Each of the seven will have its own color theme, and lolita style. This one is yellow, with a sweet lolita (though she could have more bows, but I was having trouble fitting them in).
This is sort of for the role-playing game I'm in, as it's part of an in-character task, but I'm by no means required to actually make the art. I just wanted to!
I was inspired partially by the works of Melinda Gebbie (the artist for Alan Moore's Lost Girls), though her art is more painterly (and sensual).
Monday, June 8, 2009
My Favorite Things: Sticky-back Foam!
Sometimes, there's a material that just stands out for its sheer versatility. One of those things hanging out in your studio you'll definitely use in a variety of projects and be so darn grateful that you thought ahead to buy it. That thing, ladies and gentlemen, is sticky-back foam.
The beauty of sticky-back foam (or adhesive-backed foam, which you can buy at JoAnns) is that when it sticks to cloth, it's easily removable, but when it sticks to other surfaces, say wood, it is pretty much permanent. Here's a short list of some of the projects I've used it for (with pictures, L-R)
Emergency Art
I had a cool new frame, but nothing oval to put in it, with a party happening in a few hours. So, I just put a fat quarter of fabric in the frame, cut out a cool moustache design out of sticky-back foam, stuck it on, and voila! Instant easy-to-make art!
Costume Details
This isn't the *best* costume detail I've ever done, but this was from years ago, when I was a mere beginner. This is Princess Zelda's sash with the Triforce/Hyrule insignia on it. All it is is two pieces of dark blue felt, with red and gold sticky back foam cut out and arranged in the Triforce/Hyrule design. Easy!
Stamp Creation
As a printmaker, I've carved dozens of stamps and woodblocks (reductive technique). You can also create stamps using the built-up method, which is what is done with sticky-back foam in this picture. Come up with a design, transfer it to the foam and cut it out, then attach it (sort of permanently) to a piece of wood or plastic. Ink and stamp!
Here I've stamped some scrap black fabric using silver screenprinting ink (not recommended - use block printing ink). I learned this technique from Lena Corwin's Printing By Hand which is a great book for anyone interested in printing on fabric.
Other projects I've done with sticky-back foam include:
Cheap Self-Promotion: using it on banners and tablecloths at conventions (just cut out your letters and stick them to the tablecloth - instant promotion!)
Resist Stenciling: Cutting out sticky-foam designs, attaching them to fabric, and then using spray dye - the areas covered remain the original color.
Are there any cool ideas for using this stuff that I'm missing? I absolutely love it and always keep some on hand.
Or, is there something in your arsenal of craft/art supplies that is surprisingly versatile? Do tell!
Friday, June 5, 2009
Studio Cleaning 2009: Mostly Done!
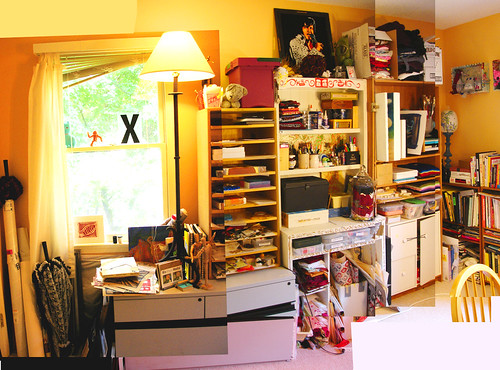
Northwest Wall of My Studio
After a few weeks of intense work, I think I'm done cleaning my studio for this year. I have a very satisfying box of stuff I'm getting rid of. Plus, I've created a few storage solutions that I'm pretty proud of. Of course, I have a few storage failures that I'll share with you, just so you know that I'm a human, and not a robot.
Storage Solutions!
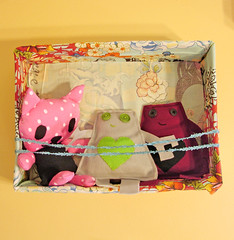
Plush Animal & Robot Corral / Storage
(click on the image for instructions on how I made this)
I'm making more and more stuffed animals, as I think they're really cute, fun to design and... well, anyway, they were all over my studio. And when you spend a lot of time painting and other stuff, you can't risk your stuffed robots, kitties, platypenguins, or what-have-you getting ruined.
I wanted floating shelves, but I knew they'd have to have some sort of corral-like action to keep these top-heavy friends from flopping right out. Taking cues from various stuffed animal storage I've seen (like plate shelves) I decided to make these. They do what they're supposed to: cutely store the stuffed animals out of my way!
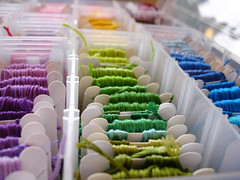
Embroidery Thread! Finally off the floor!
I know, it's not exciting or innovative to actually store your embroidery thread on the little winding cards, but it took a lot of episodes of "The Wire" for me to finish this, and the colors are just so pretty that I had to post a picture of it. Mmm, satisfying!
Storage Failures!
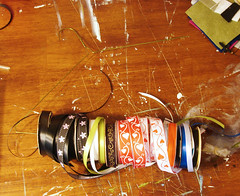
Ribbon Storage FAIL
I thought that ribbon and trim storage was a simple thing. I cut an old wire hanger and put all my ribbon on it, re-connected the cut with tape and hung it up! Hooray! Problem solved! Ten minutes later the tape popped and the beribboned metal hanger hit me in the head. Boo.
For the future, does anyone have any storage ideas for storing ribbon or trim? What about polycotton stuffing, where do you keep it?
I'll post some more of the goodies I've found that I want to get rid of - perhaps we'll have a giveaway! I still have a huge pile of paper to go through. Oh, and I guess I should post pictures of the other side of the room, just to prove there's not piles of stuff hiding over there (here's a secret - the piles are hiding in the hallway).
If you want to see more detailed photos of my studio, with tons of notes, head on over to my flickr photostream and check it out.
Wednesday, June 3, 2009
Etsy Treasury Feature!
Click on the image above to check out all of the awesome products in the "My Bleeding Heart" Treasury (created by MarkHed on etsy)
If you click on the above image, the views could bump up the treasury to being on the Etsy.com homepage.
This isn't the first time someone has put something I've made into a treasury, but it's the first time I've gone through the trouble of figuring out just what in the heck a treasury is, and how they work.
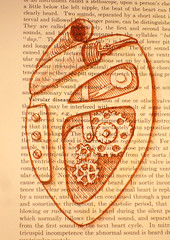
A full view of my Mechanical Heart Drawing (seen in the treasury in the upper left hand corner).
It's kind of exciting, in a way - someone collects together a themed group of products from etsy and if it gets enough views, it could end up on the homepage. It sounds really simple, but apparently making a treasury is insanely popular, and there are a limited number of them!
If you're interested in making one or seeing how they work (which is an interesting look into how etsy get their users to promote other creators) check out this Etsy Treasury creation guide.
It's always heartwarming, deep down in the cockles of your heart, when someone sends you a message that they really like your stuff. Oops, the "heart" reference was unintentional. Or maybe it's subliminal marketing!
Anyway, click here for the treasury!
Monday, June 1, 2009
Animazement 2009: Sunday
Rozen Maiden Cosplay with (L-R) Suigintou (Alison), Souseiseki (Leah/me), Suiseiseki (Michelle) and Hina-Ichigo (Annie)
Sunday was the slowest and shortest day at the con - it was kind of nice, as the other two days seemed non-stop (I'm pretty sure there were teens staying at the hotel across the street that didn't sleep at all). We used the last day to buy the things we'd had our eyes on in the Dealer room, like new dice, heart-shaped eye patches, lolita detachable sleeves and Buddha #5.
Overall, Animazement is a good anime con, and now that it's moved into the new Raleigh Convention Center, it's got lots of room to expand and improve, which I'm hoping will happen.
Kyoshi Warriors & The Cabbage Guy (from Avatar: The Last Airbender)
Remember a bit ago, when I was talking about well-done side characters? Well, here we have from Animazement a coterie of "side characters" that won hearts all over the convention - the Kyoshi Warriors and the Cabbage Salesman from Avatar: The Last Airbender. Yay!
Subscribe to:
Posts (Atom)