

Maybe the internet doesn't need another quilting tutorial, and maybe, if I knew what the heck this actual quilt block was called, I'd just link you to someone else's. But! Since I feel like making tutorials is something every good crafty blog does, and I need practice doing them, you get at tutorial. Hooray! Right?
And, it's going to be incredibly long! Because it's picture time, picture time! I'm a visual person, and I love tutorials with 1,000,000 pictures so I know when they say "flip the second piece over and sew it" that I'm flipping the correct piece over, and then sewing it EXACTLY LIKE THEY ARE. I don't want to get to step 8 and be all "Oh crap, UR DOING IT WRONG" all over everything and cry and cry.
I don't actually cry. I just give up. Or, really, what I do, is look at the entire tutorial and if it doesn't make sense with the pictures and text, then I don't do it. Which has a lot to do with my whole perfectionism thing, and my worry that I'm just going to make a mess, which I'm getting over, thank you. I am all cool with making messes.
Enough about me, let's talk some more about sewing quilt blocks. That's what we're here for.
Materials:
- Rotary Cutter
- Clear Quilter's Ruler
- Cutting Mat
- 4 Fabric Squares of the same size (I'm using 4 inch x 4 inch squares here)
- Sewing Machine & Electricity
- Thread
- Iron
- Pins!
Step 0 (not shown): Prepwork
Wash your fabric. Iron it and cut it into 4 inch squares. I like to do the cutting just whenever - watching TV or while waiting for my tea to steep - with my 4 inch square Omnigrid cutting guide made of plexiglas and my rotary cutter. In case that's helpful. Also, set up your sewing machine - thread it and all that stuff.
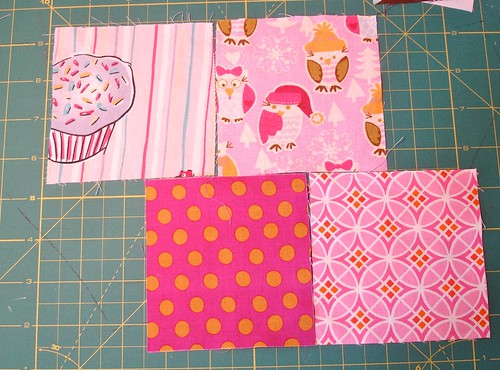
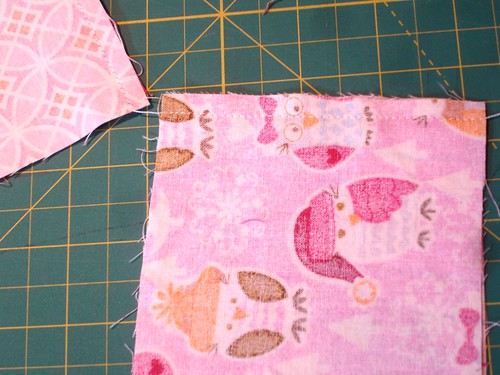
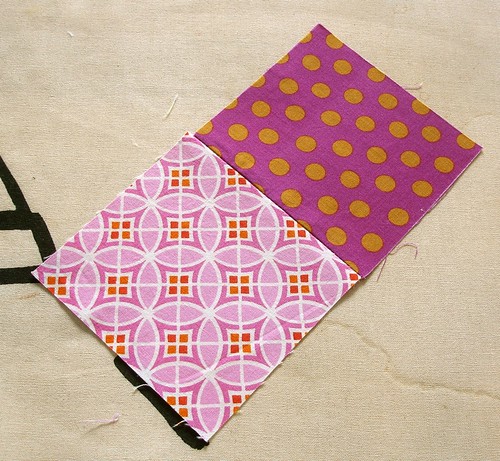
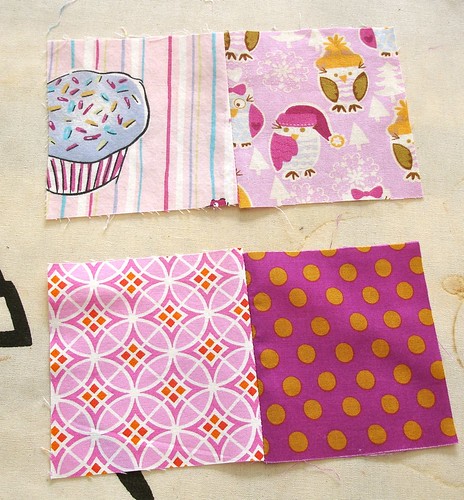
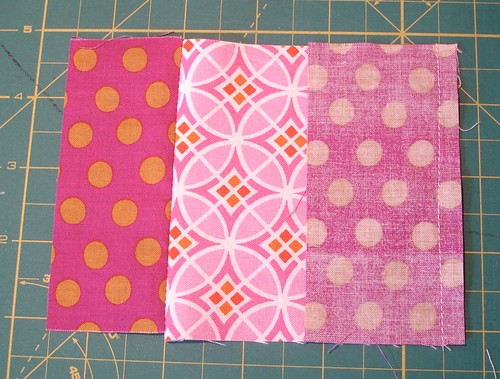
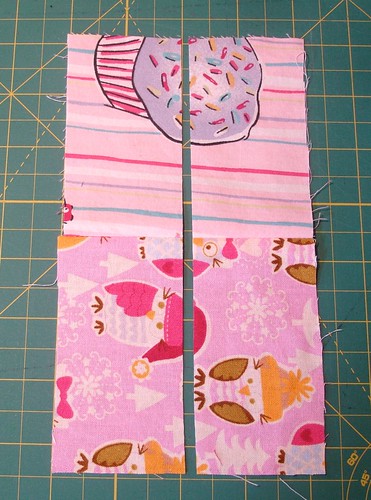
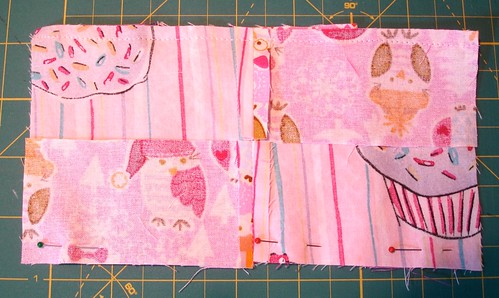
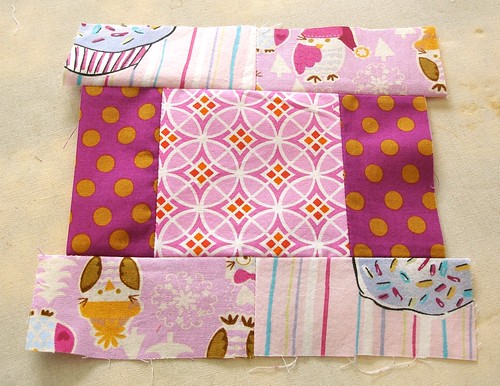
Step 1: Layout Four Squares the Way You Like
We're sort of making a picture frame (as you see in the picture above) so the top two squares I will call the Framing Pair, and the middle two squares I will call the Middle Pair. The top Framing Pair is centered in the design. The bottom "middle square" is centered with it's companion to the right. I actually decided to make the diamond design the "Middle Square" - so sorry for the confusion. I forgot to take a picture! Or I screwed up! Whichever! Just remember - AFTER this picture, diamonds are middle square and polka dots are companion square.
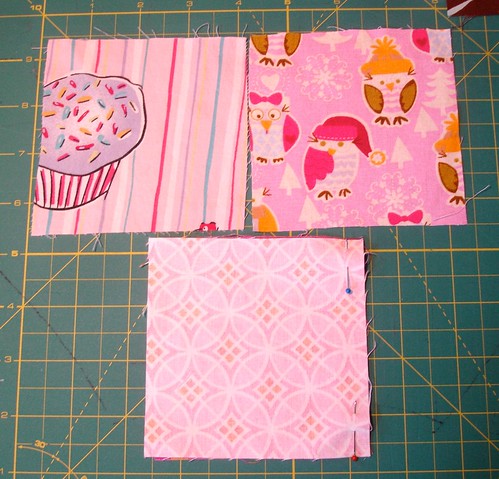
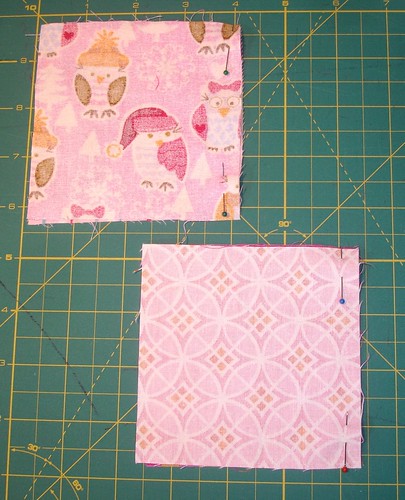
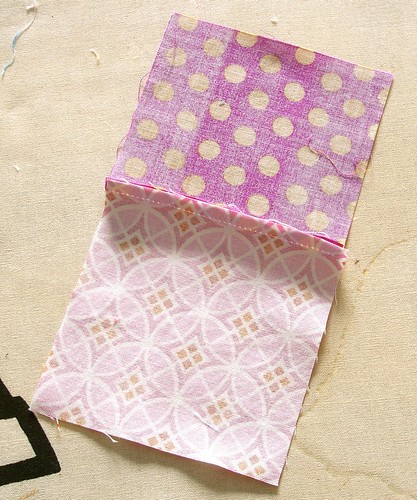
Step 2: Flip and Pin Both Pairs
Flip the right square of both pairs over onto the left square so that the right sides of the fabric are facing each other. Then pin on the right side (for optimum sewing machine feeding) of both.
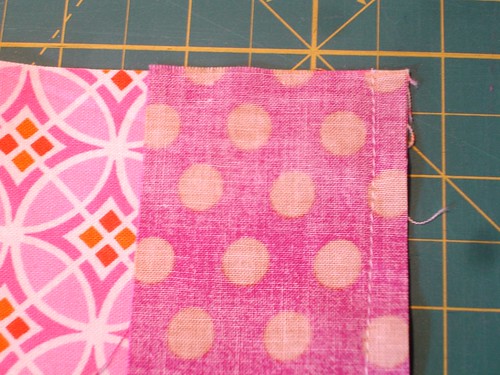
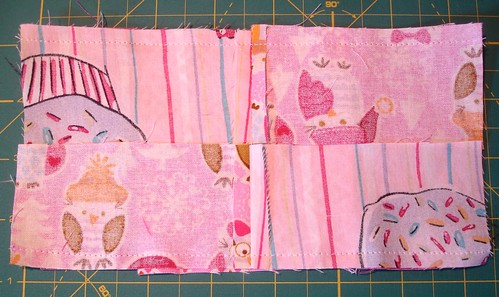
Step 3: Sew Pairs (No backstitching)
Sew each of the pairs using a straight stitch 1/4" from the right edge and don't backstitch at the beginning and end. I know, it's weird. Just sew straight through both of them. In fact, I like to feed them in one after the other (waiting a bit while running the machine between so they don't overlap). It makes a sort of cute garland! Cut them apart and trim the threads.
Note: This top picture actually has four pairs in it instead of two - I'm working on two blocks at once - the other pairs are for a white block. Don't get too confused by this, just pay attention to the pink ones!
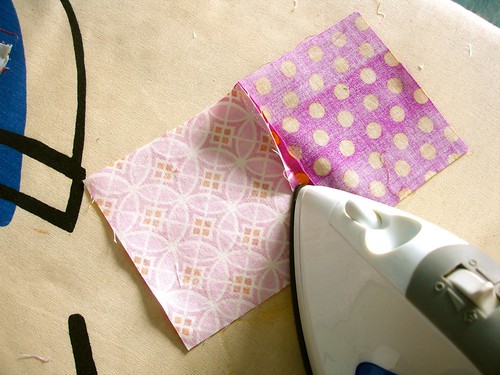
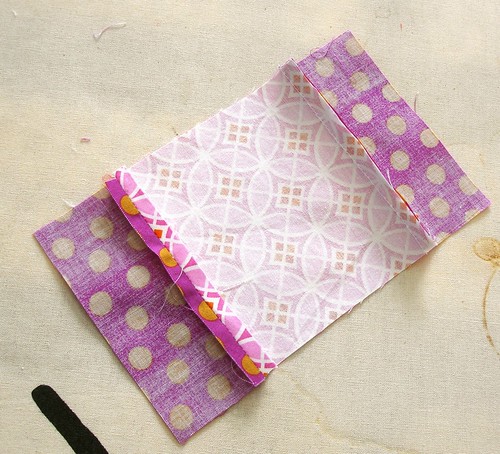
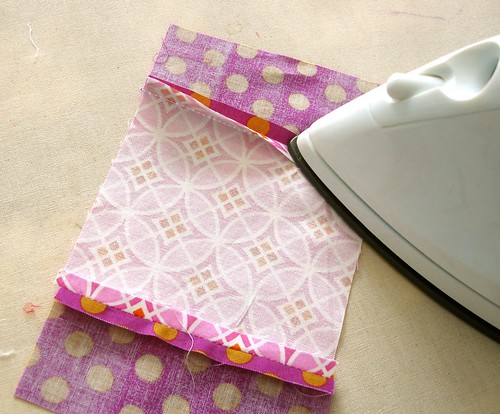
Step 4: Pressing
Set the sewn pairs on your ironing board, opening them up with the right sides down. Gently flatten down the seam allowances and press them open with your iron. Don't run the iron back and forth, move the iron by gently pressing it up and down on the fabrics. I like to think of it as gently *stomping* the fabric with the iron. Like a baby elephant. This is part of the "not having backstitched" thing, as moving the iron around may loosen your stitches and also stretch your fabric out weird. I am guilty of doing this all the time, though, so don't stress it too much, just try.
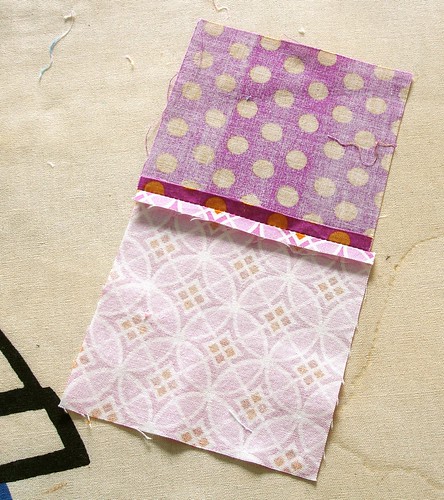
Flip the pairs over and press the front as well. Ahh, those look nice.
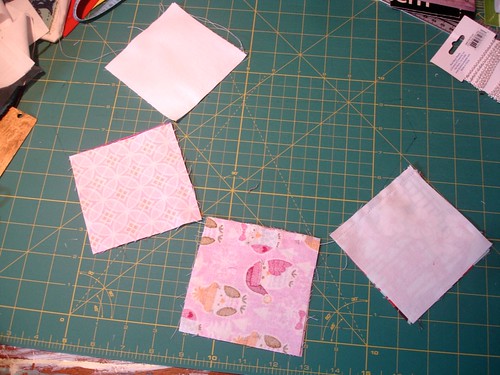
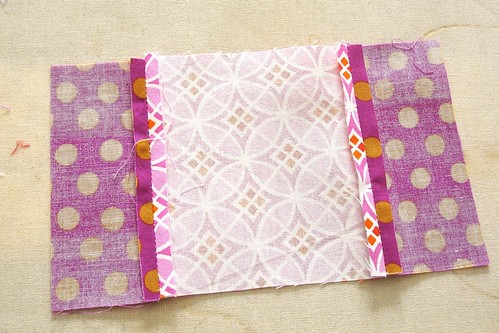
Step 5: Cutting the Middle Pair
Remember which square was your "middle square" in your Middle Pair? Good! Obviously I don't, because I am now using the diamond as the "middle square" and the polka dots as the companion. Oh well, we shall sally onward.
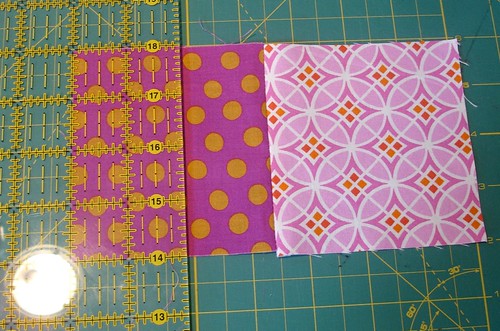
Now, take and cut the companion or non-middle square in half vertically. I use the clear plastic ruler here to measure two (2) inches from its edge (it's not going to look perfectly centered anymore, because you've sewn the other side) and cut with my rotary cutter so I end up with at 2"x4" piece.

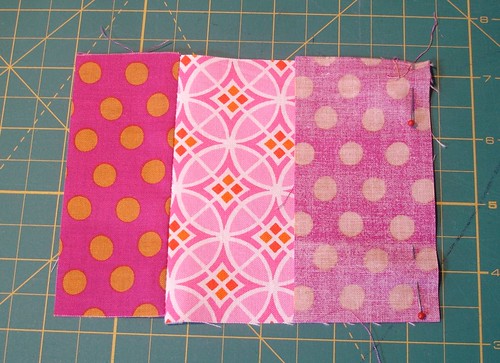
Step 6: Flip and Pin the Middle Pair
Flip the 2" x 4" piece you just cut so that the right sides are facing each other (and the wrong sides are facing out) and line it up on the other side of the Middle Square. Pin along the right side.
Step 7: Sew the Middle Pair
Sew together using a straight stitch 1/4" from the right edge and don't backstitch at the beginning and end.
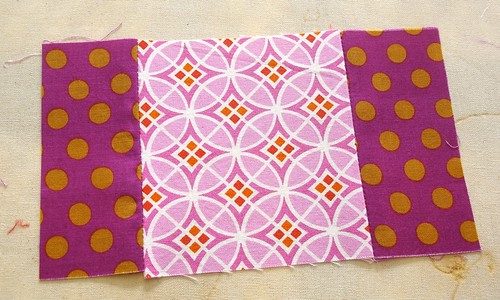
Step 8: Press the Middle Pair
Flip the fabric over and open so the right sides are all down, then gently press open the seams. Press the front as well.
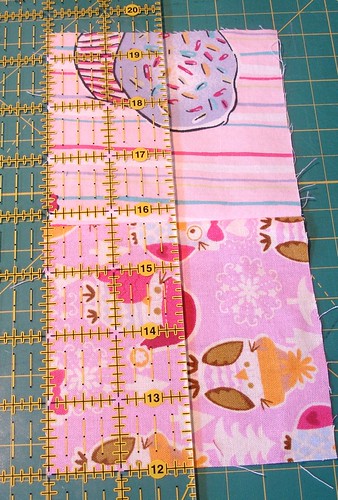
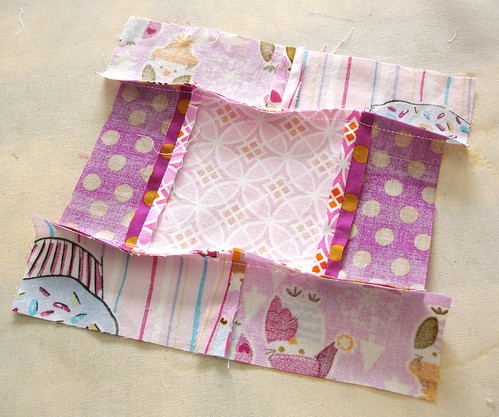
Step 9: Cutting the Framing Pair
Lay the Framing Pair above the now-completely-sewn Middle Pair and refresh your memory about how you want the block to go. Layout your Framing Pair so that it's vertical and cut it in half vertically 2" from both sides using the clear ruler. That didn't make the best sense, but essentially, you want to cut it into two long strips of 2" x 7.75" (or so).
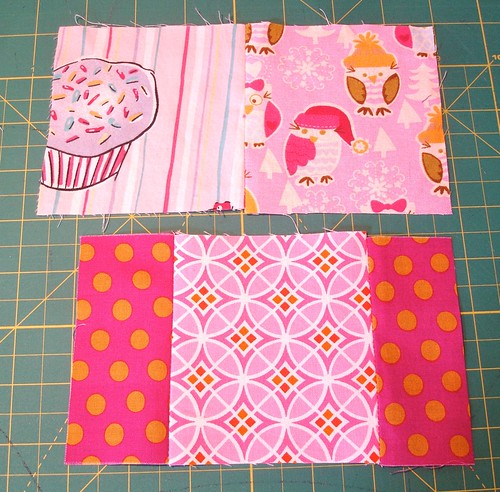
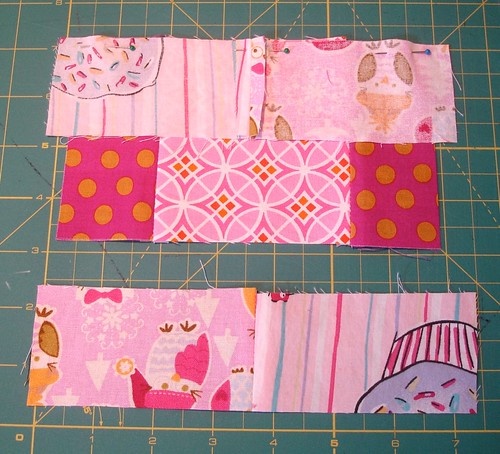
Step 10: Position and Pin Top of Framing Pair
Layout the cut Framing Pair around the now-completely-sewn Middle Pair. Try and center the Framing Pair seams. I like to alternate the sides of the patterns, so the Framing cupcake is on the left at the top, and on the right at the bottom, but you're welcome to do this however you like.
Step 11: Sew Top of Framing Pair
Sew 1/4" from edge using a straight stitch. Do not backstitch.
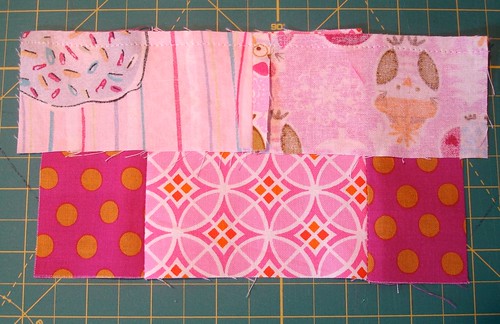
Step 12: Position and Pin Bottom of Framing Pair
For once after sewing you don't immediately go and press! Nope! This time, bring the just sewn and still folded piece back over and line up the bottom of the framing pair so that the the right sides of the bottom framing pair are laid down on the right sides of the middle pair, and match up the seams from the top of the framing pair (part you've just sewn) and the bottom of the framing pair.
Step 13: Sew Bottom of Framing Pair
Sew 1/4" from edge using a straight stitch, and (say it with me) do not backstitch.
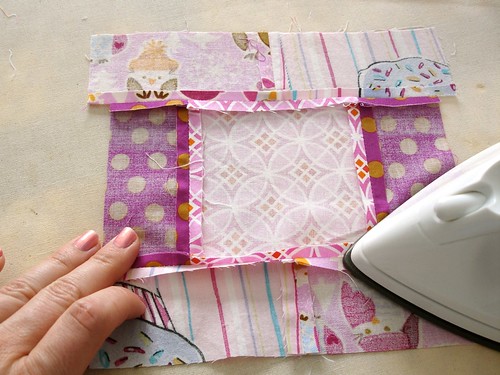
Step 14: Press it One More Time!
Unfold and lay the block flat on the ironing board with all the right sides facing down. Gently press the seams open with the iron, pressing it up and down on the seams, not moving it all around. Then flip over and press from the front.
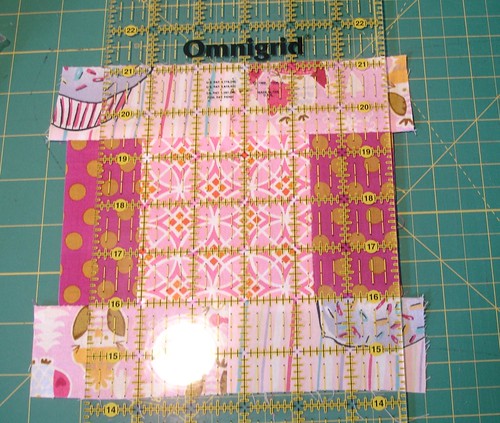
Step 15: Square Up/Trim Edges
Take the quilt block back to your cutting mat and trim it into a square shape using your clear plastic ruler and rotary cutter.
You Now Have a Square!
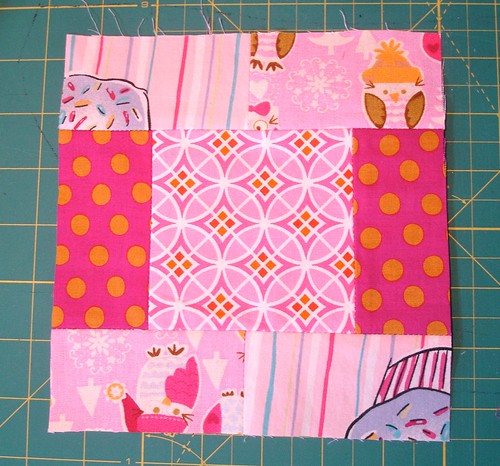
Since I'm using four inch squares to begin with, the end block is a bit of an odd size - it's like 7.75" x 7.75" so I'm not entirely sure what size I'm going to do the final "squaring up" to. I'll be sure to post it when I'm through.
Tips!
- Be sure when cutting your fabric squares to cut with the fabric threads squaring up as well. Otherwise, cutting them when they're going diagonally, or on the bias, will make them all stretchy and weird.
- If you do maintenance and re-threading on your sewing machine, be sure to have extra fabric around to do some test runs on before using your "actual" fabric. That way you don't screw up one of your pieces.
- I like to to work on two squares at a time, one with an all white frame and a patterned one. See
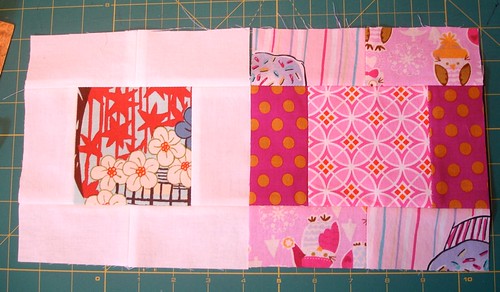
I don't get confused, and it's easy to to double-up some of the work. Other people can probably do more.
I hope that helped somebody out there. It's a pretty easy block that doesn't require much of you, alternating the blocks with white framed blocks looks really pretty to me.
4 comments:
*sigh* You make it look so easy, but I *really* don't need another hobby. But then again, I *did* kind of promise my grandma a quilt... (Worst granddaughter ever.)
We could work on it together! I mean, not that I'm encouraging you to take up another hobby. But it *is* so easy!
I love looking at quilts, but other than plain old squares, the whole thing looks like it takes a long time, no? My sewing time is so limited these days that I'm sewing off things like blankets in favor of quick animal pillows and shirt mods.
It definitely takes longer than squares - but because I have such a mish-mash of fabrics, this will make it look a little less like color hell, and more like organized color hell. Which is to say, maybe it will look okay?
Post a Comment