
Parts I liked:
- Pattern directions were relatively simple and made sense
- The overall shirt I made it kind of cool
Parts I didn't like:
- I used two different shirts to make the front and it shows
- The neckline is behaving oddly, and I think it's because I finished it with a zig-zag stitch, which stretched it out
- I only took REALLY crappy pictures of the entire project - sorry!
Here's the Large CBLDF tshirt beforehand, with the pattern:
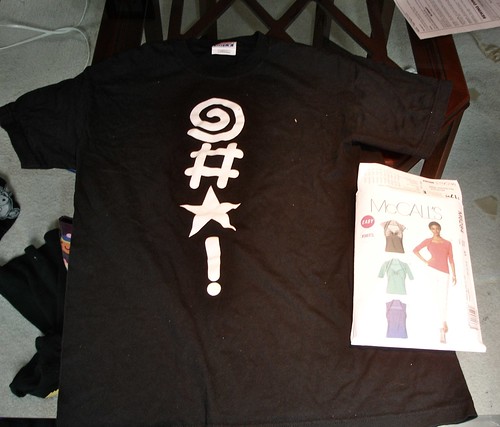
I really wanted to take that centered design and have it going down the left side of the shirt, which mean that instead of one large front piece, I had to make two smaller front pieces and sew them together. Which I did out of this shirt, and another black tshirt, that doesn't *exactly* match up. It's probably not too obvious to other people. I did it *on purpose*, right?
Finished project:
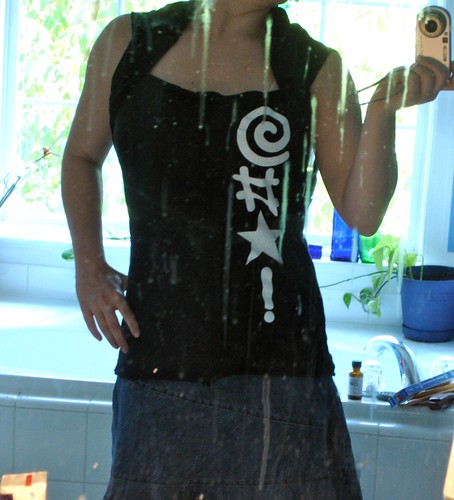
For a first shirt, this isn't so bad. Especially since I instantly begin modifying things to fit my own liking (splitting the front piece). I can't wait to make the next one out of some more tshirts I have (some are Nick's old shirts). I have a feeling I'm going to have a lot of black tops in the near future!
Today, though, I'm going to be playing with bleach pens, so I'll be posting the results of that tomorrow!
3 comments:
Awesome stuff. I look forward to seeing your results with the bleach pens.
Thanks! The bleach pen stuff actually came out cooler than expected!
Looks cool! Just stumbled on your blog while looking for Ambush Bug art. Congrats on your skills.
Post a Comment